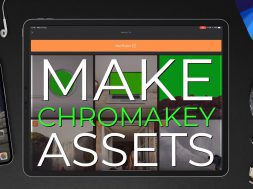
Watch a Video Editor Turn Still Images Into Chromakey Video Assets Using LumaFusion


#iamstulittle #lumafusion #chromakey
Using Chromakey techniques to transition from one clip to the next is just one of many ways I use this masking technique. In this lengthy tutorial I will show you how I take still images and turn them into 4K Chromakey Video Assets using #Photoshop, #ArtStudioPro and #ProCreate as well as one of my favourite apps #MotionLeap by Lighttricks.
I then bring the assets back into LumaFusion for final placement, sizing and colour grading. It’s a long video so pour yourself a beverage, sit back, relax and watch the chaos 😜 unfold.
Enjoy!
Cheers Stu
______________
00:00 – Introduction
00:30 – Editing Landscape image in Photoshop*
01:08 – Editing MacBook image in Art Studio Pro**
02:35 – Editing Porthole image in Pro Create***
04:10 – Introducing the Motion Leap App
04:30 – Editing Landscape image in Motion Leap*
05:58 – Editing MacBook image in Motion Leap**
08:30 – Editing Porthole image in Motion Leap***
11:11 – Editing Landscape image in LumaFusion*
15:36 – Editing MacBook image in LumaFusion**
19:46 – Editing Porthole image in LumaFusion***
23:30 – Don’t forget to “Subscribe” to the channel
______________
🔗 – https://linktr.ee/iamstulittle
______________
🎗- If you want to support the channel, then you can buy me a coffee ☕️ at – https://ko-fi.com/iamstulittle – And in return I will give you a 3 Hour + LumaFusion Training Course and other exclusive videos and assets! 🤗


